General UA Behavior 2
Previous  Top  Next

The General UA Behavior 2 screen of General Program Settings on UA Preferences includes two functions that affect charting.

Choose Market from Market Spec. List


The choice of, "In Data Series Manager, choose market from Market Spec Factsheet" saves you the step of clicking the [Mkts] button to display the factsheet when adding a portfolio item or creating a chart. If you already know the CSI number or symbol of the market(s) you wish to add or chart, you'll probably want to type them into the box instead of choosing from a list, in which case displaying the factsheet would slow you down. Click this box if it will be beneficial for your application.

genuabeh2


Prefer Month Numbers in Graphs

When displaying charts with UA, the software displays a calendar that includes month names along the bottom of the chart whenever possible. In compressed, long-term charts with significant overlap and in charts of weekly, monthly or even longer term price bars, there may be insufficient room to display the month name, or even an abbreviation of the month name in the calendar. In this case, UA uses a letter such as those used by futures and options exchanges to identify delivery months:

F = Jan, G = Feb, H = Mar, J = Apr, K = May. M = Jun, N = Jul, Q = Aug, U = Sep, V = Oct, X = Nov, Z = Dec

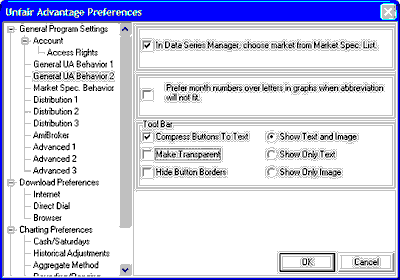
These can be confusing to stock traders who are unaccustomed to delivery months on their calendars. If you would prefer to have UA use a number to identify calendar months (e.g. 1 = January, 2 = February, etc), click the "Prefer month numbers..." checkbox on this screen.

Tool Bar

The UA tool bar (toolbar) presentation can have a significant impact on your charts because the toolbar buttons can use a significant amount of real estate. Click your choices from these user settings:

Compress Buttons To Text: This affects the horizontal space used by the buttons. When checked, the buttons are only as wide as required to accommodate the text description. When not selected, the toolbar buttons are a uniform width, regardless of the space needed to accommodate the text.

Make Transparent: This adjusts the appearance of the toolbar buttons. When checked, the color background is removed.

Hide Button Borders: When checked, the lines between toolbar buttons do not display.

Show Text and Image: This provides the full toolbar images as shown here:

text&image


Show Only Text: This reduces the height of the toolbar, reserving more space for charting:

textonly


Show Only Image: This produces toolbar buttons with just graphic icons. The result is smaller than "Text and Image," but larger than "Text Only":

imageonly


This topic concludes the UA Charts chapter.

See the "Interpreted Studies" chapter for information on advanced and custom analysis through UA's Interpreted Studies..