When viewing a chart with Unfair Advantage, you have access to several useful features listed on the "Chart Tools" menu.
To use, click the "Chart Tools" button at the far right of the chart toolbar. Alternately, click the "Chart" menu and then select "Apply Tool."

The tools menu displays:
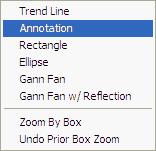
Choose from:
Trend Line
Add one or more trend lines to any UA chart by clicking "Trend Line." Although it may seem as if nothing has changed, your next mouse click will define the starting point of a trend line on your chart.
Click on whatever point is to be the starting point, then, with the mouse button still held down, move your mouse to draw the line to its terminus. Release the mouse button on the ending point to finish off your trend line. Repeat the entire process to draw additional trend lines. Each will be drawn in a different color.
Annotations
Write notes on your UA chart with this feature. Click "Annotation" and our next mouse click will determine the placement of a text box on your chart.
Click on whatever point on your chart is to be the location of your annotation. A text box will display. Type your message, which is limited to the space shown, and press <Enter> to complete your entry.
Rectangle
Add rectangles to any UA chart to add visibility to chart formations. Click "Rectangle," and your next mouse click will define the starting point of a rectangle on your chart.
Click on whatever point is to be the starting point, then, with the mouse button still held down, move your mouse to expand the rectangle to the desired size and shape. Release the mouse button to finish off the rectangle. Repeat the entire process to draw additional rectangles, as desired. Each will be drawn in a different color.
Ellipse
Like the rectangle, the ellipse is a geometric shape used by some chartists to evaluate chart formations. To add ellipses to your UA chart, click "Ellipse" and your next mouse click will define the starting point of the ellipse.
Click on whatever point is to be the starting point, then, with the mouse button still held down, move your mouse to expand the ellipse to the desired size and shape. Release the mouse button to finish off the ellipse. Repeat the entire process to draw additional ellipse, as desired. Each will be drawn in a different color.
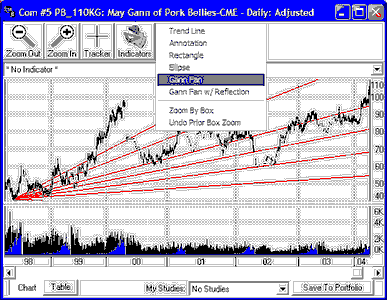
Gann Fan
W. D. Gann's analysis techniques focused on the relationship between time price, which his "Gann Fan" charting technique illuminates. UA automatically creates Gann Fans radiating outward from your chosen reference point. Since the typical use of this tool is to show angles representing the rate of equivalence between time and price from significant tops and bottoms, your chosen reference point should be a top or bottom on a chart (usually a Gann Contract continuous chart). The slopes of the fan lines are: 8, 6, 4, 3, 2, 1, -1, -2, -3, -4, -6, -8.
To add a Gann Fan to your chart, click "Gann Fan" and then click the top or bottom you wish to use as your reference point. The Gann Fan displays. Note that Gann Fans are often projected into the future, so you may want to "Add Blank Records" before adding Gann Fans to your chart.
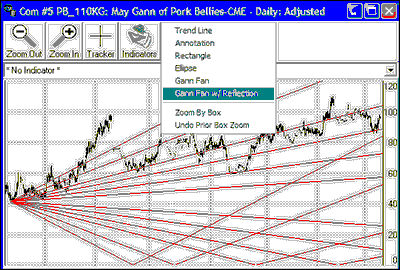
Gann Fan with Reflection
Gann Fans (described above) can be displayed with an additional feature called "Reflection," which shows the fan angles bouncing off the theoretical bottom of your chart (zero).
To add a Gann Fan with Reflection to your chart, click "Gann Fan with Reflection" and then click the single top or bottom you wish to use as your reference point. The Gann Fan with Reflection displays. The vertical size of your chart determines how much of the reflected angles display on your chart. Use "Enlarge Price Range" through the Right-Click menu to adjust. You may also want to use "Add Blank Records" to add a buffer for forward projection before adding Gann Fan with Reflection to your chart.
Zoom By Box
The "Zoom by Box" feature is another way to change the quantity of data shown on your charts.
Click "Zoom By Box" and you will be able to define a box representing the time period you wish to view on the screen. Set the first boundary by placing your cursor at the desired position and clicking the mouse button. Hold down the button and drag the cursor to the desired location, thus creating an expanding box. When the box is formed as desired, release the mouse button. The date period within the defined box will now fill the screen.
Undo Prior Zoom
To unzoom, return to the Chart Tools menu and click "Undo Prior Box Zoom." Alternately, you can use the "Zoom Out" icon to reduce the zoom level.
Removing Tools
To erase all trend lines, annotations, rectangles and ellipses, click the "Chart" menu at the top of your UA screen and then click "Clear Chart Tools/Annotations."